SpookyBlue's Guide to Electro Luminescent Wire

Mounting the armatures to the backboard

This was a simple task because the backboard is fabric-covered cardboard.  I used floral pins to hold everything in place.  They're sort of like staples.  Just slide them into the fabric at an angle.  Don't try to push them through the cardboard.  My wife tells me that these shadow boxes are all very similar.  The fabric is strong enough to hold the pins in place, so chances are this will work with other shadow boxes too.

Any wire that isn't part of the actual sign should be hidden, so I drilled holes through the backboard and slid the wires through.  Those are the ratholes.  I made up the name.  You can quietly mutter it as you're searching through your local arts and crafts shop for floral pins.

Place the armatures where they belong and insert the pins.  Drill ratholes and slide the ends of the wires through.

If you have masked a long enough section of wire, you'll have more choices where to drill your rathole.  I masked 3-4" so that the masked wire could lie flat for a space.  This will keep you from putting any extra pressure on the armatures when you feed the wire through the rathole.
 

Aren't you glad you haven't soldered your wires to the power supply yet?  After feeding the wire through the rat holes, I placed a small square of velcro over each hole.  It blends in well with the background, and when the light is running you don't even see it.

You may notice from the photos that there appears to be a lot of hot glue slop.  When the sign is lit, all you see is the colored wire.  If this still bothers you, try tying the wire off with string or maybe even smoking the enclosure glass.  After the pieces are secure, close the box and flip it over.

Routing the wire and the final hookup

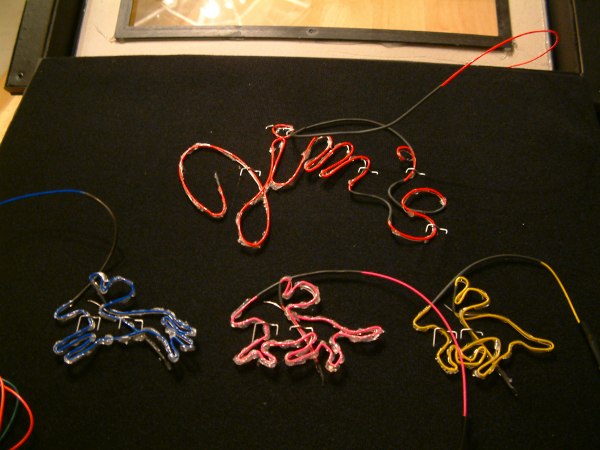
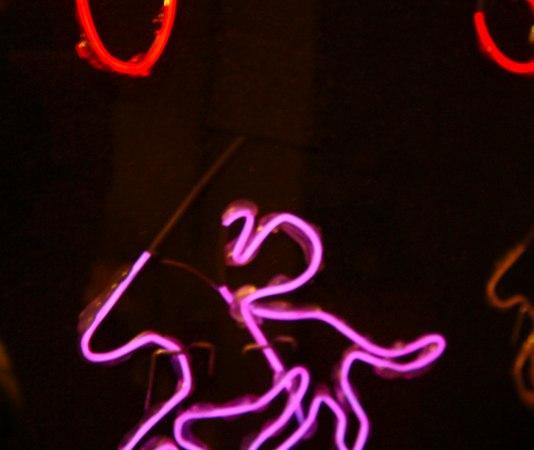
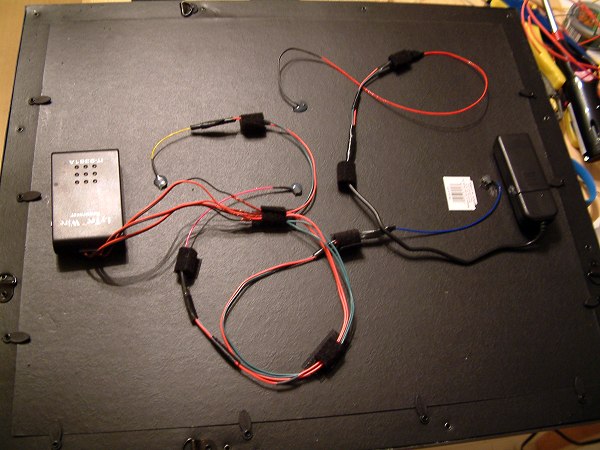
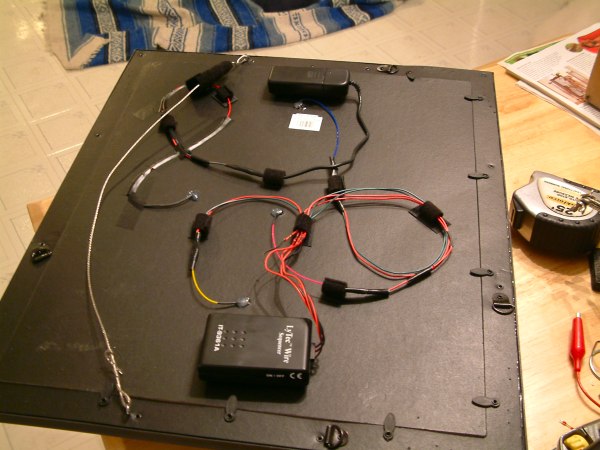
The three horsemen are animated by the sequencer.  It is the larger box on the left.  The fourth horseman declined to take part in our project.  This particular sequencer has three leads to which each el-wire horse is attached.  Might want to go revisit the 
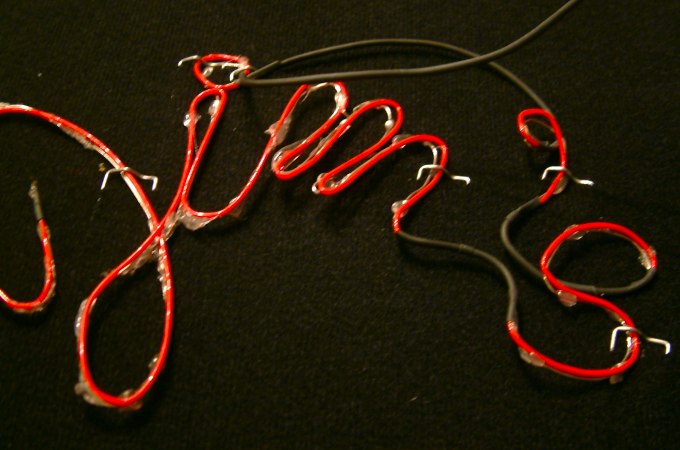
wire prep section again.  The letters are connected to a second inverter.  It's the smaller box on the right.  Now, if your sign uses multiple inverters and/or sequencers, you can hack them to use a single on/off switch.  I ran out of time, so there is a switch on each box.

Notice that there is a lot of extra wire looped around back there.   Feel free to trim any excess wire from your sign, but make sure to leave enough that you won't have any problems connecting to the inverter(s).  I used velcro strips and dabs of hot glue to keep things in place.  Attach a wire hanger and you're finished.  To add a little protection to the exposed wires I draped a black cloth over the back and tacked it into place with hot glue.

When mounting your inverter, keep in mind that you're going to have to be able to reach the on/off switch.  If you don't like the idea of the boxes being attached to the back of the enclosure, or if you're planning on using a wall wart to power your sign, run wiring through a cable and let it hang down to the floor.  Make sure to run the wiring through a loop securely attached to the box.

That's it.  Want to see video of the sign in action?  Sure you do.  Click here.