
How to "make wood" out of foam
- Foam insulation board
Owens Corning pink "Foamular" rigid insulation boards are the best material I've found for carving everything from coffin lids to signs to tombstones. 3/4"x4'x8' sheets can be made into "brick" or "wood" walls, and the thicker boards make great tombstones. If you're lucky enough to have a distributor in your neighborhood, then this is the way to go. Home Depot generally carries this brand. As of 09/09/2007, the cost was $14 for a 3/4"x4'x8' sheet, and around $26 for the 2" thick version.
If you can't locate the pink material, there is a blue version that will also do the job. Just make sure to peel away the plastic covering before you start carving. - Carving tools
I do most of my carving using nothing but a medium grit sandpaper. However, you can also add a blunt tool for making dents and a screwdriver for gouging. A ballpoint pen with the cap on makes a great dent-maker.
- Flat latex paint & a brush
Use black or dark brown for a base coat, and lighter gray or tan for dry brushing the highlights.
A one-inch or wider brush works well. - What about styrofoam?
I honestly don't know. Never used it. Pink and blue extruded polystyrene board will not absorb as much moisture as expanded polystyrene (sytrofoam). I would think that a styrofoam sheet would work, but since it's made of all those tiny little balls, you're likely to run into issues not covered here. More info
Materials List
Step 1 - Start carving
What kind of wood do you want when you're finished? A knotty irregular pattern like the side of an old barn? Smooth and sexy lines like the paneling in your uncle Armando's basement rumpus room?
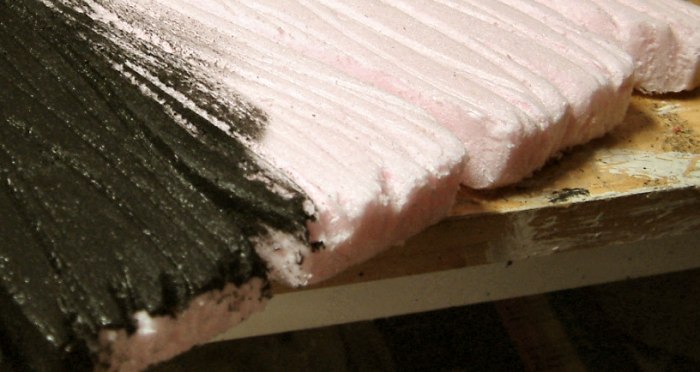
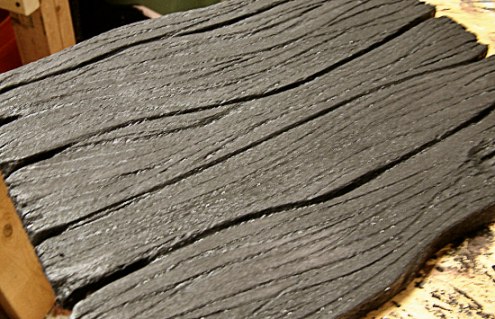
Start by laying out the general pattern using your blunt dent maker. Drag across the surface with just enough pressure to leave an indentation.
If you're feeling more adventurous, fold a piece of sandpaper a few times or roll it into a cylinder and use it to draw the grain. With this method, use short strokes. Carve out out small areas, then smooth them out with your sandpaper cylinder.
 Whatever pattern you decide on, I've found that the more irregular it is the more realistic the final product. Use lots of curves. Straight lines tend to look drawn.
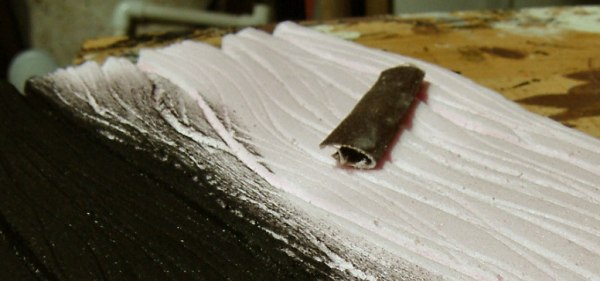
Carve all the way to the edge of the sheet. Make deeper grooves in between the "boards". If you're carving a full sheet of foam, stagger the ends of your "boards" so they don't all line up. Use your screwdriver to gouge out some knot holes. Chew up the edges. Dig some worm holes. Have fun!
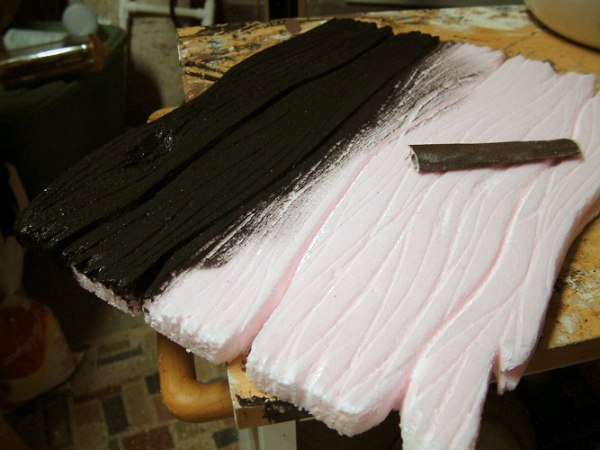
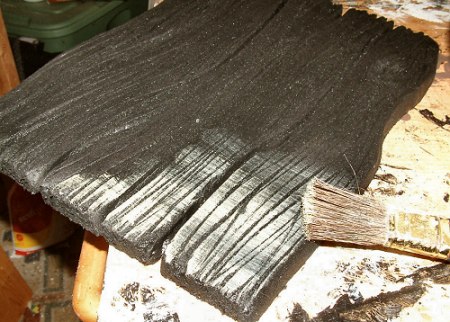
When you've finished carving, go back and smooth everything out with a good sanding. Sanding the surface will help it to more easily accept paint and makes a nice texture. Round off sharp edges with sandpaper, too. By the way, pay no attention to the half-painted board in the pictures. I forgot to take pictures before I started painting.
Step 2 - Lay down a dark base coat
Fill in every crack, crevice, and hole with dark paint. When you come back later and dry brush, you don't want any pink or blue spots. Sort of looks like little blobs of bubble gum.
Allow to dry completely before moving on to step three.
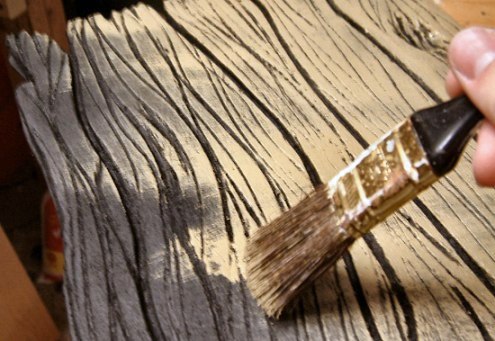
Step 3 - Dry brush the highlights
Dry brushing is a simple and effective painting technique that really brings out the dark grooves in your wood grain.
The idea is to apply paint only to the high spots. To do this, load your brush with paint, then wipe most it back off again. Usually, just dragging it across the lip of the paint can is sufficient to remove enough paint. You can wipe your brush with a rag, but this wastes paint. You don't want it to drip into the low areas, so don't thin your paint.
Lightly drag the brush across the surface perpendicular to the direction of the grain. This will help to keep your bristles from expanding into the grooves. If you've been having trouble visualizing what we're attempting, it will become apparent after a few strokes. The wood grain should really (magically) start to stand out.
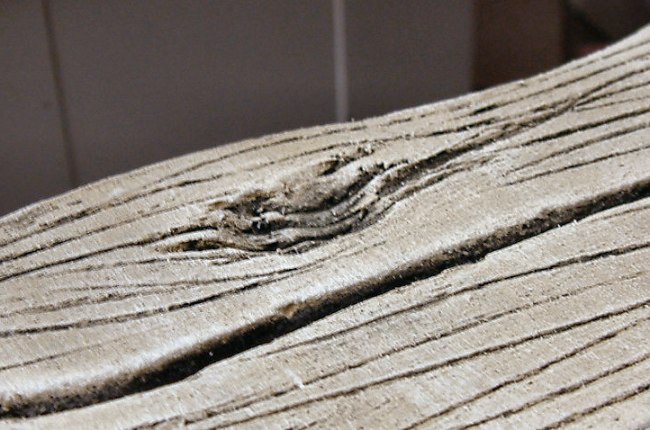
Step 4 - Admire
Check out that cool knot hole. Now is when you'll wish that you had made lots of other neat digs and gouges.
That's all there is to it. Before committing to carving a full sheet of foam, you might want to practice on a smaller piece to get the hang of it first. Mastering the technique of dry brushing will open new avenues in your other projects from scarecrows to tombstones.
If you found this write-up helpful, please let us know! Have fun haunting.