|
Walter (method 1) is a fine corpse, but we wanted to turn up the creep factor about fifty notches and build something that no one (around here, anyway) had ever seen before. A really nasty, skeletal corpse needs a skeleton, so we built one out of rolled up newspaper.
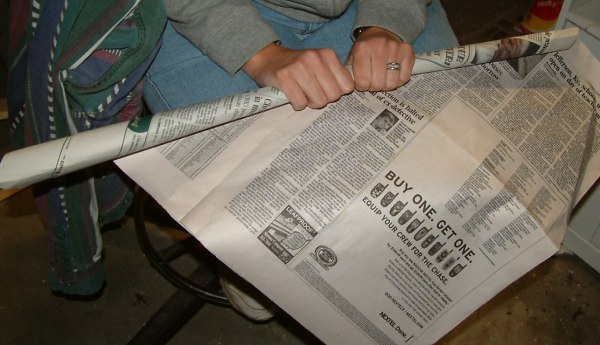
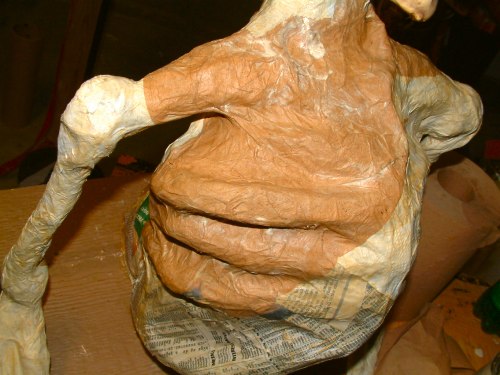
Harold the corpse is just a torso, so he needed four ribs, a collar bone, and arms. He also needed a breast bone to hold his ribs in place. We tightly rolled 3 full sheets of newspaper (in layers) for each bone and wrapped them in duct tape. Sections that were a little too long were easily cut to the proper size.
|
|
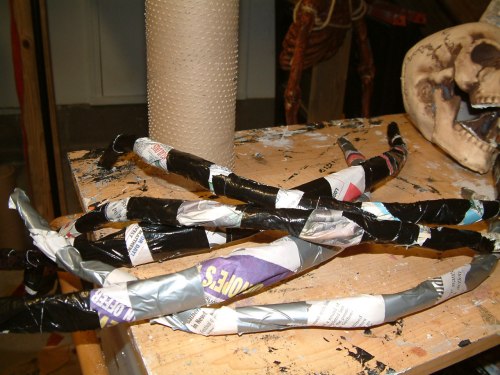
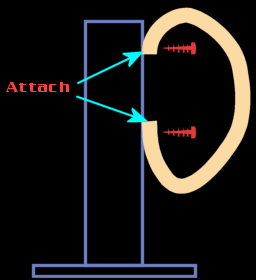
| We found that it was easier to make lots of bones first, then build our skeleton from the pieces. An empty cardboard tube from an industrial fabric roll made an excellent upright, but you can use scrap wood, or even pvc. Just make sure that your upright is strong enough to support everything, and attach it to a plywood base. If plywood isn't an option, a few pieces of scrap wood or a short length of 2x4 will work just fine. |
|
|
Harold's breastbone is much longer than it really needs to be, but that's okay. This was our first corpse of this style, so we'll work refinements like a shorter breastbone into later versions (Bob, Xavier, Horace).
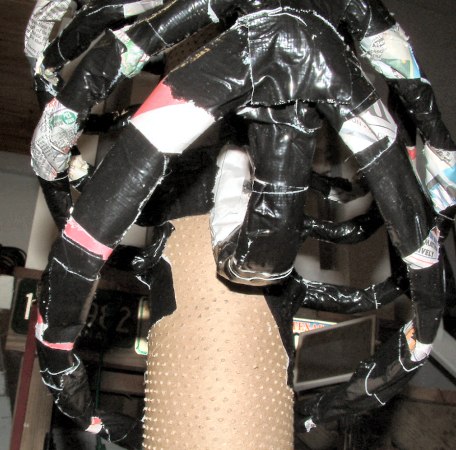
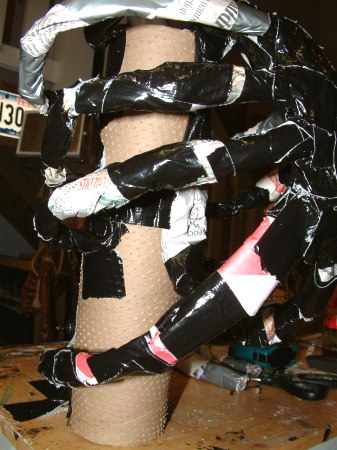
Bend one of your newspaper "bones" to form a "C" and attach the ends to the upright with drywall screws. This works well as long as you don't tighten them down too far. Go too far and the paper will pull right through.
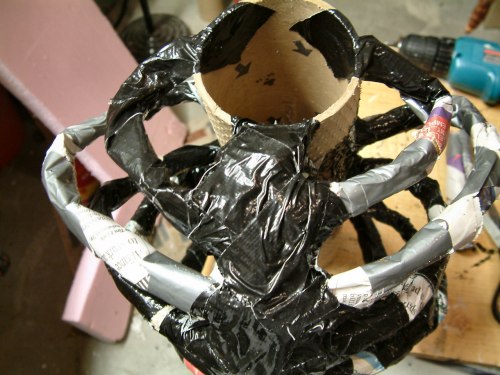
One full-length rolled-up duct-taped newspaper bone is just the right size for two ribs. Cut it in half and duct tape the ribs to either side of the breast bone. Bend them around and duct tape to the upright. Repeat this for each rib, angling them downward as you get closer to the base.
Experiment with different lengths for each rib, and don't be afraid to use lots of duct tape. The cheap stuff from Big Lots works very well. Introduce deformities if you want. Build one side of the torso higher than the other, or better yet, mount the upright at an angle so your corpse is hunched over, leaning forward, leaning back, whatever.
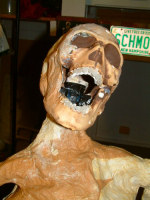
This is the point at which your corpse will take on a distinct character. What is he doing besides just sitting there? Has he just broken free of the ground and is taking his first rancid breath in years? Is he crawling toward an unsuspecting prey item? (TOTs make great unsuspecting prey items) Maybe he's really agitated, angry, screaming, scratching, ordering a drink ... something. The idea is to capture a moment and freeze it.
If you notice that some of your bones bend too easily or crimp, then wrap them with a little extra
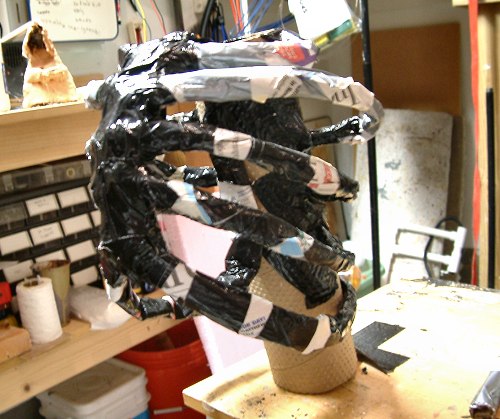
duct tape, or wrap an extra layer of newspaper around them. It should look sort of like an Alien in larval form attacking your upright.
"How do we kill it Ash? There's got to be a way of killing it, how - HOW do we do it?" ~~ |
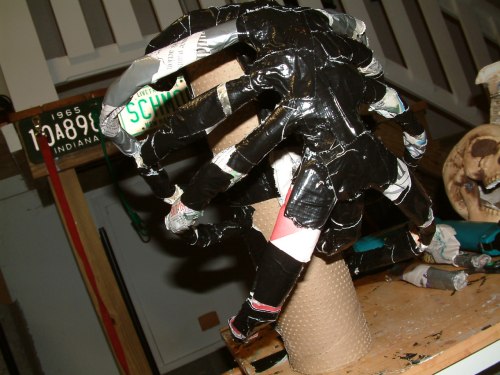
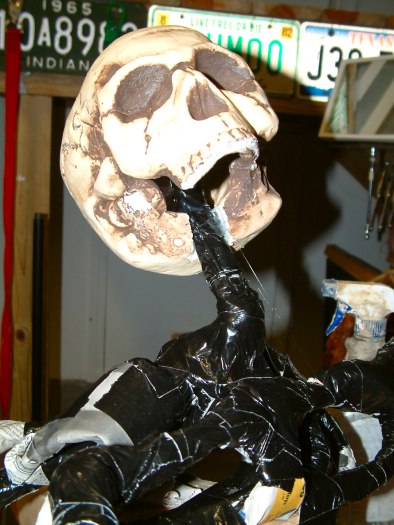
The neck bone's connected to the head bone. Attach another newspaper roll to the upright for the "neck bone". This will take some adjusting to get it just the right length. Of course, a long-neck corpse looks pretty icky, too, so if that's what you're going for then have at it.
More newspaper bones attached to the top of the upright (to form the clavicle) make an excellent place to attach the arms. We opted not to make hands for this corpse since they'd just be lost in our graveyard grass that hadn't been mowed since October 1.
Add extra wads of newspaper at the joints to make them look nice and boney. We went the extra mile and rolled two bones (radius and ulna) for Harold's forearms. A good graphic of the human skeleton is very helpful. If you have a spare bucky lying around with aspirations of a modeling career, that works even better. |
|
|
|
|
|
And my head, I'd be scratchin', while my thoughts were busy hatchin', if I only had a brain ... and a head.
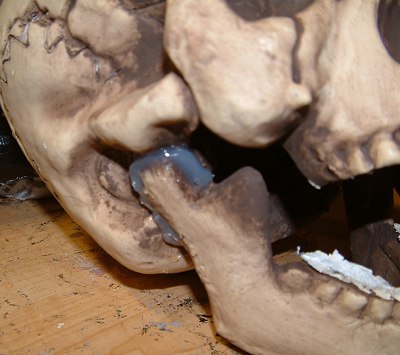
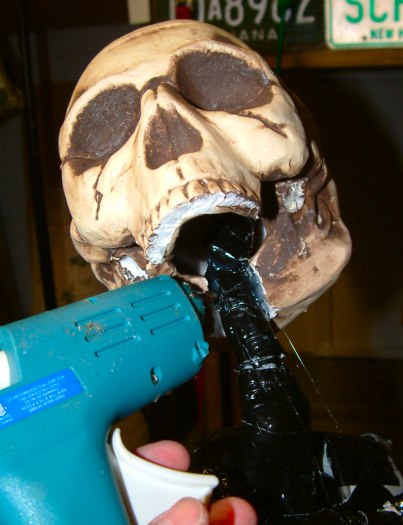
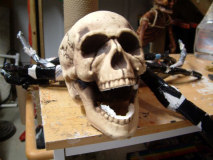
This particular foam skull came from Walgreens, but I have seen them at Big Lots for around $5. The jaw is closed. However, with a few razor blade cuts it comes right off. Then just reset it with a little hot glue. You can also make your own paper mache skulls that look even better than the foam ones shown here.
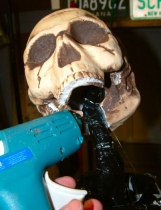
It might be a good idea to attach your headbone to the neckbone before gluing the jaw back on (sigh...but we learned). Just cut a neckbone-sized slot in the bottom of the skull and hot glue it to the neck. A plasic skull would probably work just fine, but you may need to route out the "neck hole" for a snug fit. And you want your head to fit tightly. Otherwise you may end up with a corpse that is preoccupied with the sky ... or the ground ... or that just basically looks like the robot from Lost in Space after he got his power pack pulled out. |
|
|
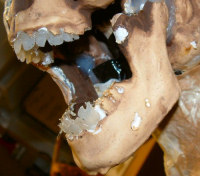
This foam skull had the straightest teeth we've ever seen. Not scary. So we made some teeth using Gary Adam's neat hot glue trick (scroll down to the foam head section). We cut away thousands of dollars of orthodontia, then used a woodburner (soldering iron) to burn sockets for his new teeth. Put a dab of hot glue in each socket, then push in the new tooth.
If you're into vampires, then you can make some really long, pointy canines that would give Anne Rice a warm-all-over feeling. We were fairly conservative with our teeth, but you can make yours really gross. If you need some ideas, just think back to those really scary posters your dentist has hanging in his office to terrify you into seeing him twice a year. "Do you floss? No? Well, then check out poor Eugene over here." <shiver> |
|